
HTML概念和元素(标签)
什么是HTML
HTML(Hyper Text Markup Language),中文译名为超文本标记语言,它包括一系列标签,通过这些标签可以将网络上的文档格式统一,使分散的Internet资源连接为一个逻辑整体。简单来说,就是我们用它所包含的一系列标签来定义网页的布局结构。
什么是HTML标签(元素)
HTML 文档是由 HTML 元素定义的,元素由三部分组成:开始标签、元素内容、结束标签。
HTML 元素以开始标签起始,以结束标签终止,元素的内容是开始标签与结束标签之间的内容。在VSCode中,使用标签只需要输入需要使用的标签名,再按Tab键,编辑器会自动补齐开始标签和结束标签的样式。
温馨提示:
1.标签的括号我们用的是尖括号,这也是HTML代码和CSS(层叠样式表)代码的区别。
2.HTML 标签对大小写不敏感,也就是说不管我们用大写还是小写浏览器都能成功识别,但是为了统一标准,最好还是写小写。
元素的层次结构
大多数 HTML 元素可以包含其他 HTML 元素,形成嵌套结构
如图,div元素内部包含一个p元素,形成嵌套。在嵌套结构中,p的上一级元素是div,我们称div是p的父元素,p是div的子元素,他们之间是父子级关系。
若是如图这样body、div、p三个元素嵌套,p的上一级元素是div,div的上一级元素是body,那么div是body的子元素,body是div的父元素,body和div是父子关系。而p和body中间隔了一个div,那么p就是body的后代元素,body是p的祖先元素,他们是祖先和后代的关系。
若是两个元素拥有一个共同的父元素,也就是两个元素的上一级元素是同一个,那么这两个元素互为兄弟元素。
需要注意的是,两个元素之间不能相互嵌套
p的起始标签在div内部,结束标签却在div外部,这样的嵌套结构是错误的,浏览器在解析的时候会自动在p的起始标签后补上结束标签,在结束标签前面补上起始标签。
当我们打开浏览器检查器之后就会发现div和p的层次结构已经发生了改变。
元素的属性
属性是元素的附加信息,比如超链链接的地址就是元素的附加信息,属性一般写在元素的起始标签里。
这是一个a标签,起始标签的href="http://www.baidu.com"就是a标签的属性,点击‘百度’后自动跳转属性里的网址。属性由属性名和属性值两部分组成,‘href’是属性的属性名,后面的网址是属性值,属性值要用引号括起来。
空元素(自闭合元素)
空元素没有元素内容和结束标签,只有起始标签。空元素内可以加上属性,例如插入图片的img标签
img标签没有元素内容和结束标签,起始标签内有属性,属性值是图片地址。
一般情况下,图片用空标签,音频视频不适用空标签
HTML注释
注释是对代码功能的描述,一般是写给开发者和维护者看的,浏览器并不会解析注释里的内容。因为在代码编写的过程中,代码繁多杂乱,写上注释能帮助我们快速理解当前代码的功能,给维护提供方便。
VSCode注释的写法:在尖括号内写上 !–和--,中间写上注释的内容,或者选中想要注释的行,按下快捷键CTRL+?。
语义化标签和div
div是无语义标签,就是没有含义的标签。而所谓语义化标签,就是有含义的标签,一看就知道其内部含义。我们平时使用语义化标签和div来划分区域,他们在功能上是没有任何区别的,只是语义化标签能帮助开发者和维护者清晰地理解划分的每个区域都是用来干嘛的。在HTML5之前都是用div来划分区域,就会导致整篇代码全是div,看得人眼花缭乱不易于阅读,语义化标签的出现就能解决这个问题。
在HTML5中新增了几个语义化标签:
header:用于表示页面的头部
nav:表示导航栏
article:表示文章或其他可独立存在的页面
section:表示一个整体的一部分主题
aside:表示跟周围主题相关的附加信息
footer:表示页面或某个区域的注脚
蓝蓝设计( www.lanlanwork.com )是一家专注而深入的界面设计公司,为期望卓越的国内外企业提供卓越的UI界面设计、BS界面设计 、 cs界面设计 、 ipad界面设计 、 包装设计 、 图标定制 、 用户体验 、交互设计、 网站建设 、平面设计服务
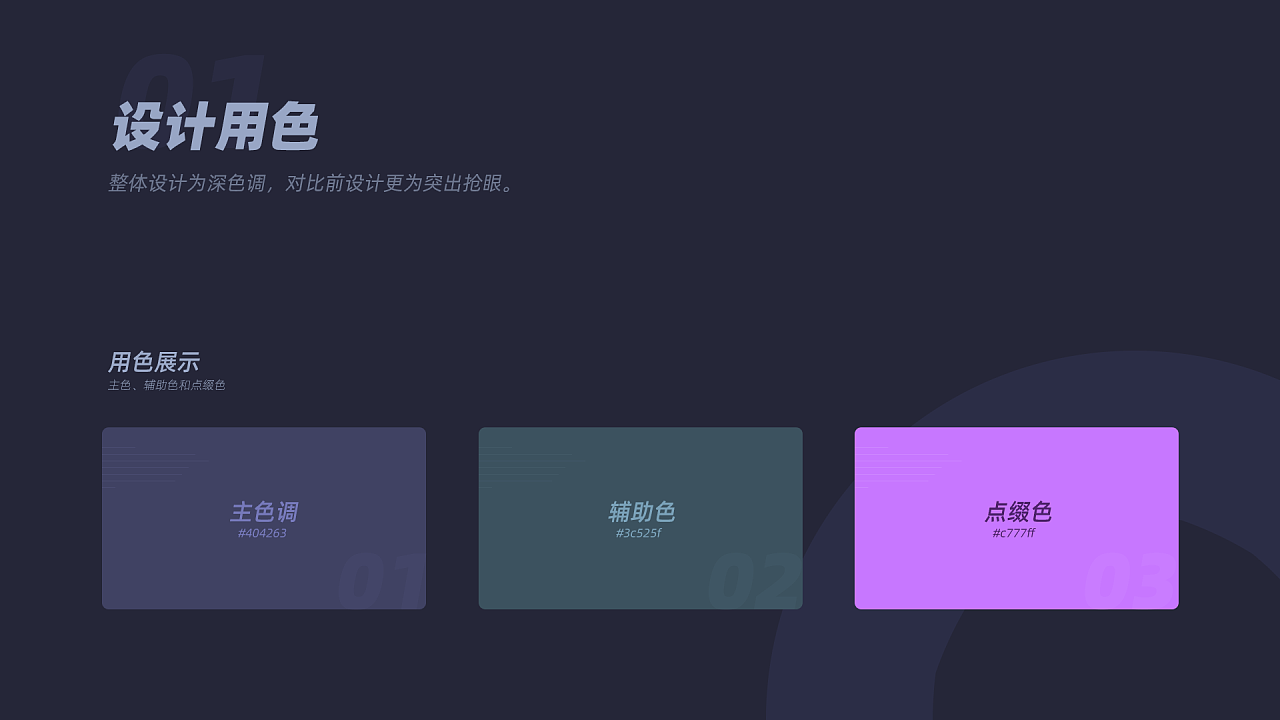
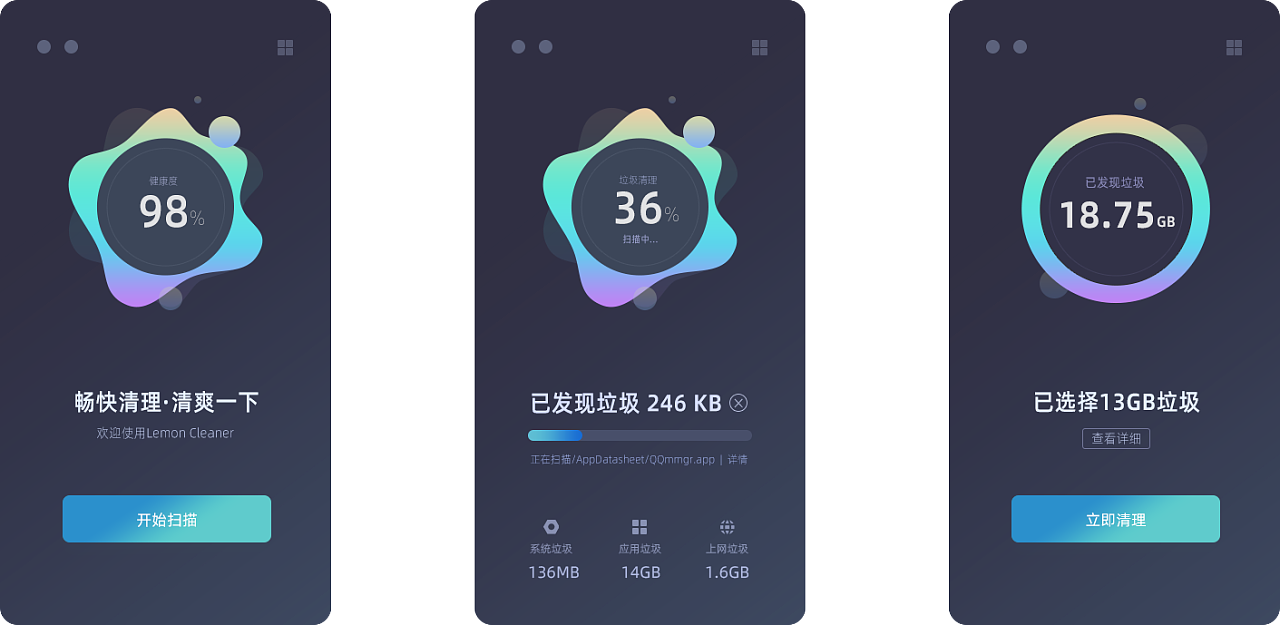
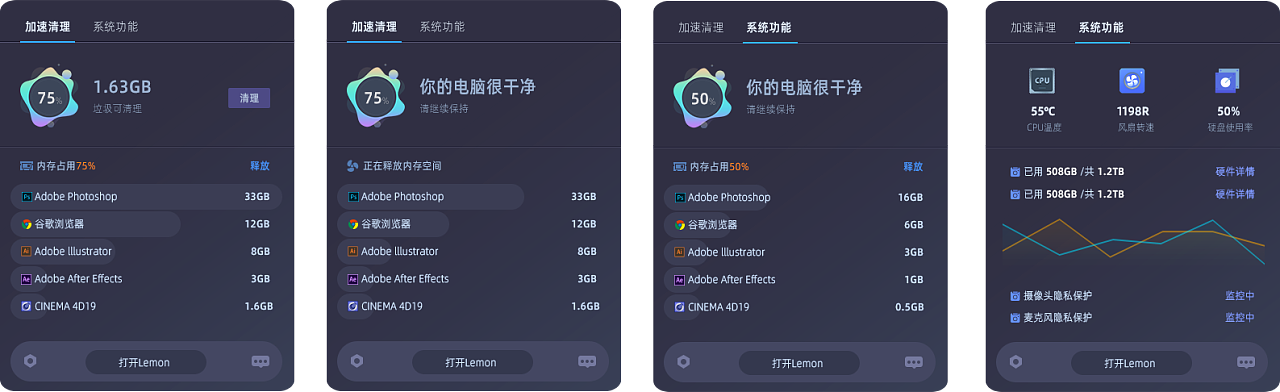
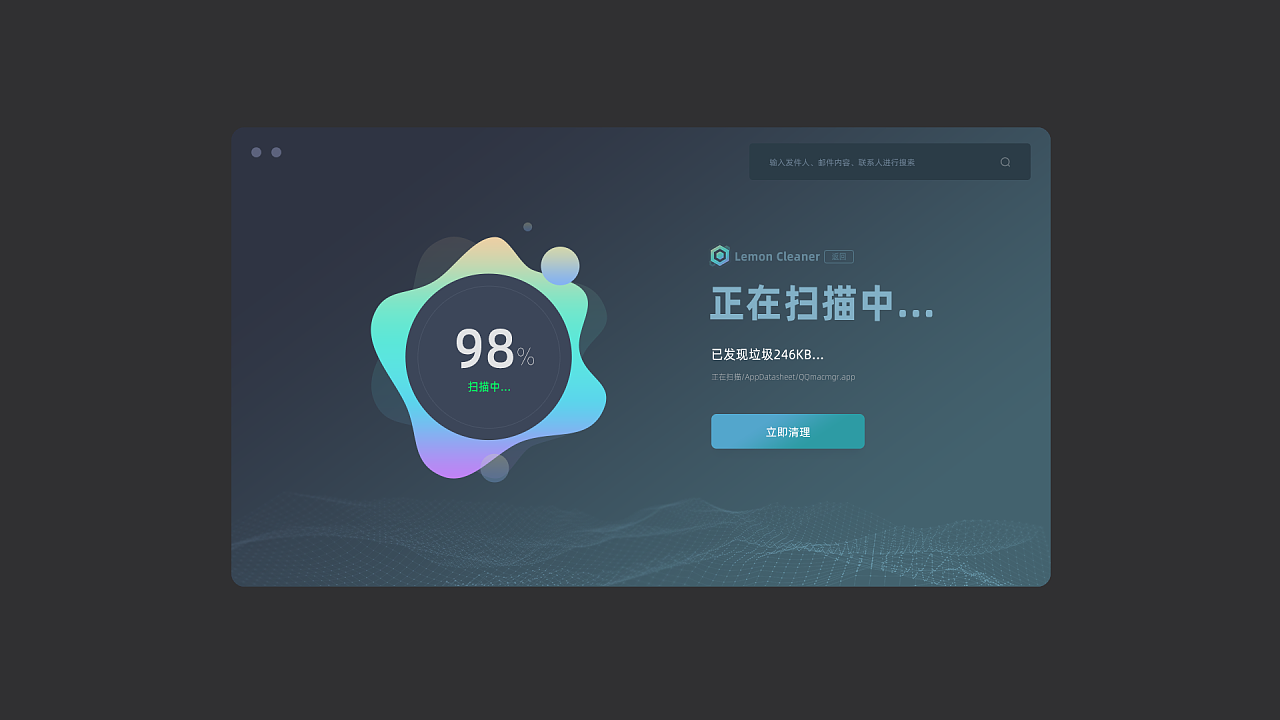
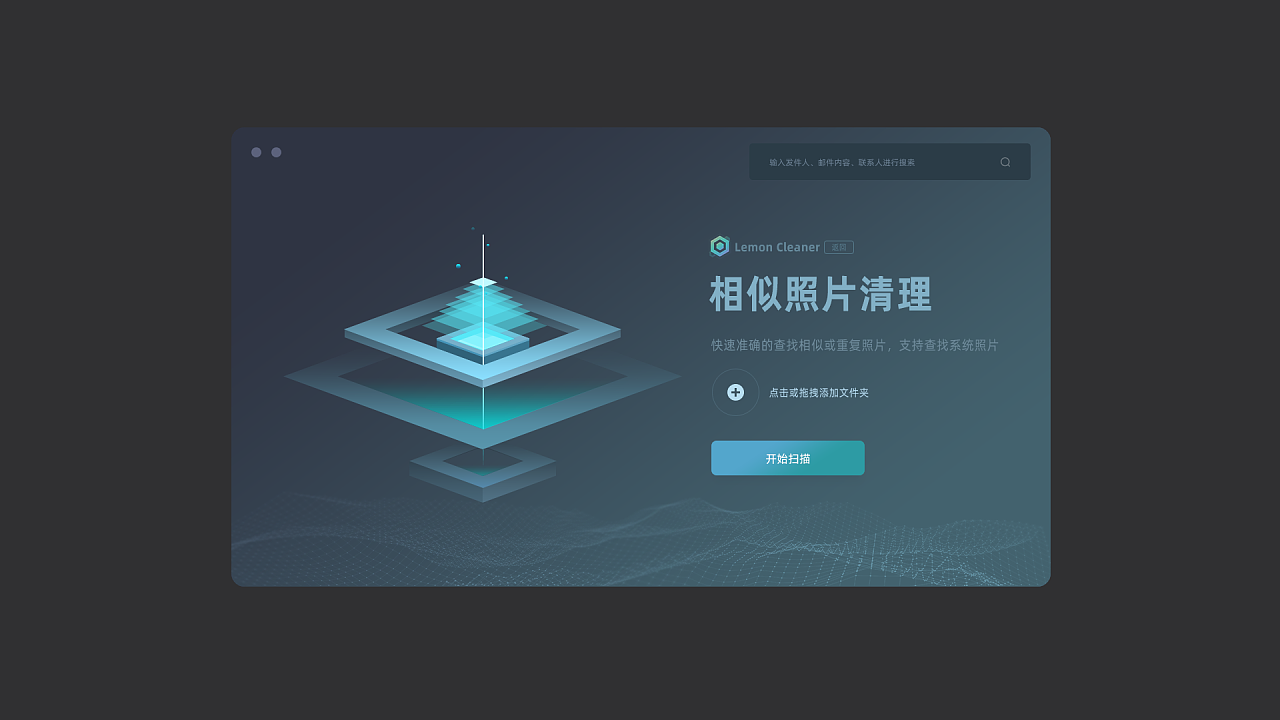
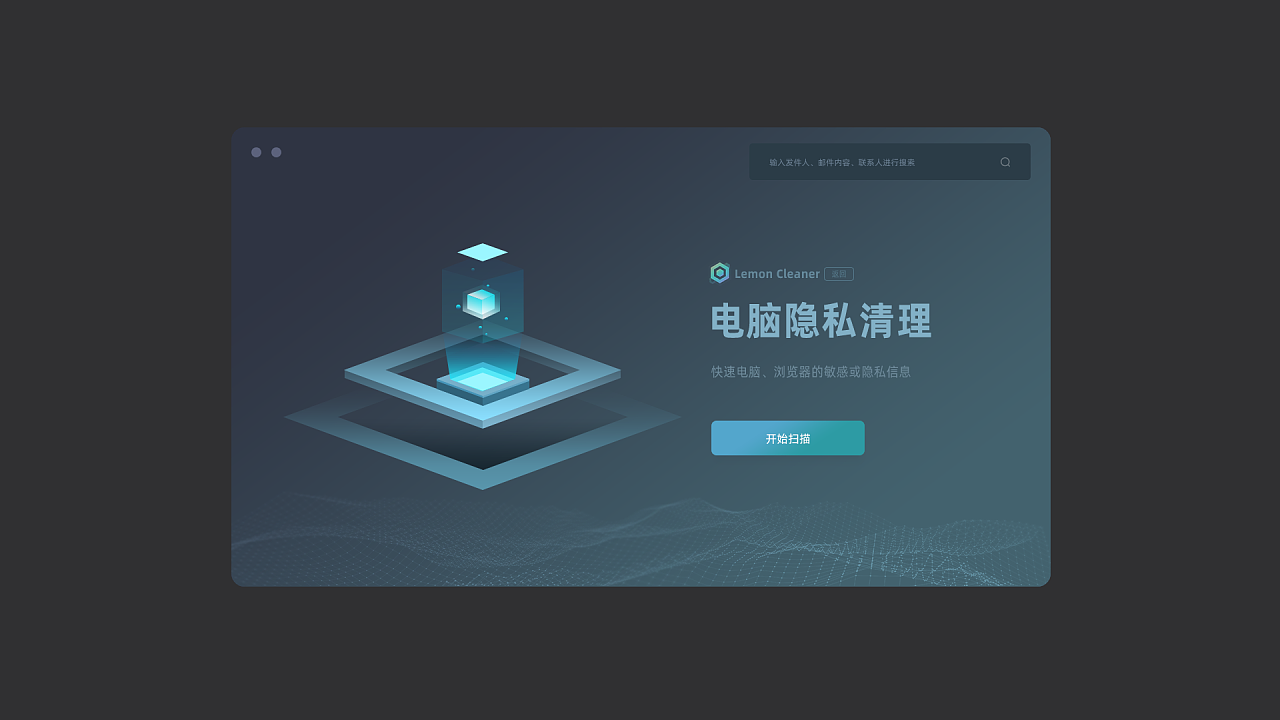
移动互联网的迅速崛起,让移动网页,移动客户端越来越重要,客户端的页面设计也是一门很大的学问。科技迅速发展的今手机屏幕的尺寸越来越放大化,但却始终 很有限,因此,在APP的界面设计中,精简是一贯的准则。这里所说的精简并不是内容上尽可能的少量,而是要注重重点的表达。在视觉上也要遵循用户的视觉逻 辑,用户看着顺眼了,才会真正的喜欢。
如果这几个主要功能入口屏幕占比能更大些、界面中的菜单导航层级能再简化些...也不至于连我自己想找到一个能跟亲人通话的入口都比较困难,更别说老人了。
接下来为大家分享精美的app UI设计案例:
蓝蓝设计(北京兰亭妙微科技有限公司)是一家专注而深入的UI设计公司,公司对UI设计的追求一向很高,致力于为卓越的国内外企业提供卓越的手机 ui设计、软件界面设计、网站设计,用户研究、交互设计等服务。


--手机appUI设计--
JS学习笔记
js和java的异同点
变量声明
函数声明
js中的变量提升和函数提升
为什么有变量提升
总结
js和java的异同点
首先,js的语法和kottlin的语法有些相似。比如var,方法声明用
function 方法名称 (参数名称...){
//方法内部逻辑
}
还有变量类型声明 :
数据类型 : 变量名=值
区别:一:js的数据类型和java类似。只不过js中的数据类型number将java中的int,double,float整合了。
二:js中可以不用声明变量类型。变量不声明数据类型的话,那么他的类型取决于当前的值是什么数据类型。举例:
var num=0;
num-"lyyyyyyyyyyyyyy";
num=[];
num={};
三:js中的类型判断:
判断基本类型,返回一个字符串
1
console.log(typeof '');//string
console.log(typeof []);//object
console.log(typeof {});//object
console.log(typeof 1);//number
console.log(typeof null);//object
console.log(typeof undefined);//undefined
console.log(typeof true);//boolean
console.log(typeof function(){});//function
console.log(typeof /\d/);//object
检查某个对象属于哪个构造函数,返回true/false
1
function A(){};
function B(){};
let a = new A();
console.log(a instanceof A);
console.log(a instanceof B);
console.log([] instanceof Array);//true
console.log({} instanceof Object);//true
console.log(/\d/ instanceof RegExp);//true
console.log(function(){} instanceof Object);//true
console.log(function(){} instanceof Function);//true
变量声明
js的变量声明其实大体上可以分为三种:var声明、let与const声明和函数声明。
函数声明
doSomething();
function doSomething() {
console.log('doSomething');
}
var foodoSomething= 2;
你觉得上面会输出什么?TypeError吗?其实输出的结果是foo。这就引出了我们的问题了,当函数声明与其他声明一起出现的时候,是以谁为准呢?答案就是,函数声明高于一切,毕竟函数是js的第一公民。
那么,下面的例子呢?
doSomething();
function doSomething() {
console.log('1');
}
function doSomething() {
console.log('2');
}
当出现多个函数声明,那怎么办呢?以上代码输出结果为2。
因为有多个函数声明的时候,是由最后面的函数声明来替代前面的。
domeSomething();
var domeSomething= function() {
console.log('domeSomething');
}
var domeSomething = function() {}这种格式我们叫做函数表达式。
它其实也是分为两部分,一部分是var foo,而一部分是foo = function() {},参照例2,我们可以知道,这道题的结果应该是报了TypeError(因为foo声明但未赋值,因此foo是undefined)。
js中的变量提升和函数提升
在js中对变量进行操作后打印值经常会出现undefined的现象。其实原因是因为js中有一个叫做变量提升的功能。举例:
1
var data="lyyyyy";
getData();
function getData(){
//第一次打印
console.log("data值为: ", data);
var data="yyyyyyy";
//第二次打印
console.log("data值为: ", data);
}
打印的值第一个为undefined,而第二个打印的值为yyyyy.
原因:
在执行getData()方法的时候会在函数内部首先将变量的声明提升到第一步。
然后再声明函数内部的函数(如果函数内部有函数的话)。
之后才会按照方法内部的逻辑先后顺序执行代码。前两步只是声明!!!
看到这里应该就已经知道为什么会有上面那样的结果了。
实际的方法内部代码执行顺序应该是这样的:
function getData(){
//一。声明变量
var data;
//二。声明函数(如果函数内部有函数的话)
//三。按照代码的顺序执行
console.log("data值为: ", data);
data="yyyyyyy";
//第二次打印
console.log("data值为: ", data);
}
看到拆分后的代码执行顺序对结果也就不迷茫了。
为什么有变量提升
那么为什么会出现变量提升这个现象呢?
其实js和其他语言一样,都要经历编译和执行阶段。而js在编译阶段的时候,会搜集所有的变量声明并且提前声明变量,而其他的语句都不会改变他们的顺序,因此,在编译阶段的时候,第一步就已经执行了,而第二步则是在执行阶段执行到该语句的时候才执行。
总结
1.js会将变量的声明提升到js顶部执行,因此对于这种语句:var a = 2;其实上js会将其分为var a;和a = 2;两部分,并且将var a这一步提升到顶部执行。
2.变量提升的本质其实是由于js引擎在编译的时候,就将所有的变量声明了,因此在执行的时候,所有的变量都已经完成声明。
3.当有多个同名变量声明的时候,函数声明会覆盖其他的声明。如果有多个函数声明,则是由最后的一个函数声明覆盖之前所有的声明。
————————————————
版权声明:本文为CSDN博主qq_45272690的原创文章,遵循CC 4.0 BY-SA版权协议,转载请附上原文出处链接及本声明。
蓝蓝设计( www.lanlanwork.com )是一家专注而深入的界面设计公司,为期望卓越的国内外企业提供卓越的UI界面设计、BS界面设计 、 cs界面设计 、 ipad界面设计 、 包装设计 、 图标定制 、 用户体验 、交互设计、 网站建设 、平面设计服务
文章目录
原文链接:https://blog.csdn.net/zy1281539626/article/details/114934551
蓝蓝设计( www.lanlanwork.com )是一家专注而深入的界面设计公司,为期望卓越的国内外企业提供卓越的UI界面设计、BS界面设计 、 cs界面设计 、 ipad界面设计 、 包装设计 、 图标定制 、 用户体验 、交互设计、 网站建设 、平面设计服务
SpringBoot与Web开发(超详细)
一、简介
二、SpringBoot对静态资源的映射规则
1、所有 /webjars/ ,都去 classpath:/META-INF/resources/webjars/ 找资源
2、"/" 访问当前项目的任何资源,都去静态资源的文件夹找映射
3、欢迎页: 静态资源文件夹下的所有index.html页面,被"/"映射
三、模板引擎
1、引入Thymeleaf
2、Thymeleaf的使用
1、导入thymeleaf的名称空间
2、使用thymeleaf语法
3、Thymeleaf的语法规则
四、SpringMVC自动配置
1、Spring MVC auto-configuration
2、扩展SpringMVC
原理
3、全面接管SpringMVC
原理
五、如何修改SpringBoot的默认配置
一、简介
使用SpringBoot的步骤:
1、创建SpringBoot应用,选中我们需要的模块。
2、SpringBoot已经默认将这些场景配置好了,只需要在配置文件中指定少量配置就可以运行起来。
3、自己编写业务代码。
自动配置原理:
xxxxAutoConfiguration:帮我们给容器中自动配置组件
xxxxProperties:配置类来封装配置文件的内容
1
2
二、SpringBoot对静态资源的映射规则
@ConfigurationProperties(prefix = "spring.resources", ignoreUnknownFields = false)
public class ResourceProperties implements ResourceLoaderAware {
//可以设置和静态资源有关的参数,缓存时间等
1
2
3
WebMvcAuotConfiguration:
@Override
public void addResourceHandlers(ResourceHandlerRegistry registry) {
if (!this.resourceProperties.isAddMappings()) {
logger.debug("Default resource handling disabled");
return;
}
Integer cachePeriod = this.resourceProperties.getCachePeriod();
if (!registry.hasMappingForPattern("/webjars/")) {
customizeResourceHandlerRegistration(
registry.addResourceHandler("/webjars/**")
.addResourceLocations(
"classpath:/META-INF/resources/webjars/")
.setCachePeriod(cachePeriod));
}
String staticPathPattern = this.mvcProperties.getStaticPathPattern();
//静态资源文件夹映射
if (!registry.hasMappingForPattern(staticPathPattern)) {
customizeResourceHandlerRegistration(
registry.addResourceHandler(staticPathPattern)
.addResourceLocations(
this.resourceProperties.getStaticLocations())
.setCachePeriod(cachePeriod));
}
}
//配置欢迎页映射
@Bean
public WelcomePageHandlerMapping welcomePageHandlerMapping(
ResourceProperties resourceProperties) {
return new WelcomePageHandlerMapping(resourceProperties.getWelcomePage(),
this.mvcProperties.getStaticPathPattern());
}
//配置喜欢的图标
@Configuration
@ConditionalOnProperty(value = "spring.mvc.favicon.enabled", matchIfMissing = true)
public static class FaviconConfiguration {
private final ResourceProperties resourceProperties;
public FaviconConfiguration(ResourceProperties resourceProperties) {
this.resourceProperties = resourceProperties;
}
@Bean
public SimpleUrlHandlerMapping faviconHandlerMapping() {
SimpleUrlHandlerMapping mapping = new SimpleUrlHandlerMapping();
mapping.setOrder(Ordered.HIGHEST_PRECEDENCE + 1);
//所有 /favicon.ico
mapping.setUrlMap(Collections.singletonMap("/favicon.ico",
faviconRequestHandler()));
return mapping;
}
@Bean
public ResourceHttpRequestHandler faviconRequestHandler() {
ResourceHttpRequestHandler requestHandler = new ResourceHttpRequestHandler();
requestHandler
.setLocations(this.resourceProperties.getFaviconLocations());
return requestHandler;
}
}
1、所有 /webjars/ ,都去 classpath:/META-INF/resources/webjars/ 找资源
webjars:以jar包的方式引入静态资源。WebJars
访问localhost:8080/webjars/jquery/3.3.1/jquery.js的结果:
2、"/" 访问当前项目的任何资源,都去静态资源的文件夹找映射
"classpath:/META-INF/resources/",
"classpath:/resources/",
"classpath:/static/",
"classpath:/public/"
"/":当前项目的根路径
例子:访问localhost:8080/abc 就是去静态资源文件夹里面找abc
例如我们访问js文件夹下的Chart.min.js:
访问结果:
3、欢迎页: 静态资源文件夹下的所有index.html页面,被"/"映射
编写index.html文件。
访问结果:
三、模板引擎
常见的模板引擎:JSP、Velocity、Freemarker、Thymeleaf(springboot推荐,语法更简单,功能更强大)
1、引入Thymeleaf
Thymeleaf官网
在pom.xml中添加以下依赖:
<dependency>
<groupId>org.springframework.boot</groupId>
<artifactId>spring-boot-starter-thymeleaf</artifactId>
</dependency>
2、Thymeleaf的使用
@ConfigurationProperties(prefix = "spring.thymeleaf")
public class ThymeleafProperties {
private static final Charset DEFAULT_ENCODING = Charset.forName("UTF-8");
private static final MimeType DEFAULT_CONTENT_TYPE = MimeType.valueOf("text/html");
public static final String DEFAULT_PREFIX = "classpath:/templates/";
public static final String DEFAULT_SUFFIX = ".html";
1
只要我们把HTML页面放在classpath:/templates/,thymeleaf就能自动渲染。
success.html:
HelloController:
package com.keafmd.springboot.controller;
import org.springframework.stereotype.Controller;
import org.springframework.web.bind.annotation.RequestMapping;
import org.springframework.web.bind.annotation.ResponseBody;
/
Keafmd
@ClassName: HelloController
@Description:
@author: 牛哄哄的柯南
@date: 2021-03-04 19:54
*/
@Controller
public class HelloController {
@ResponseBody
@RequestMapping("/hello")
public String hello(){
return "Hello World";
}
@RequestMapping("/success")
public String success() {
return "success";
}
}
访问success的结果:
1、导入thymeleaf的名称空间
<html lang="en" xmlns:th="http://www.thymeleaf.org">
1
2、使用thymeleaf语法
HelloController:
package com.keafmd.springboot.controller;
import org.springframework.stereotype.Controller;
import org.springframework.web.bind.annotation.RequestMapping;
import org.springframework.web.bind.annotation.ResponseBody;
import java.util.Map;
/*
Keafmd
@ClassName: HelloController
@Description:
@author: 牛哄哄的柯南
@date: 2021-03-04 19:54
/
@Controller
public class HelloController {
@ResponseBody
@RequestMapping("/hello")
public String hello(){
return "Hello World";
}
/*
查出一些数据在页面显示
@param map
@return
*/
@RequestMapping("/success")
public String success(Map<String,Object> map) {
map.put("hello","你好");
return "success";
}
}
success.html:
<!DOCTYPE html>
<html lang="en" xmlns:th="http://www.thymeleaf.org">
<head>
<meta charset="UTF-8">
<title>Title</title>
</head>
<body>
<h1>成功</h1>
<!--th:text 将div里面的文本内容设置为-->
<div th:text="${hello}"></div>
</body>
</html>
运行结果:
3、Thymeleaf的语法规则
1、th:任意html属性,来替换原生属性的值
th:text — 改变当前元素里面的文本内容
更多参考下图:
2、表达式
Simple expressions:(表达式语法)
Variable Expressions: ${...}:获取变量值;OGNL;
1)、获取对象的属性、调用方法
2)、使用内置的基本对象:
#ctx : the context object.
#vars: the context variables.
#locale : the context locale.
#request : (only in Web Contexts) the HttpServletRequest object.
#response : (only in Web Contexts) the HttpServletResponse object.
#session : (only in Web Contexts) the HttpSession object.
#servletContext : (only in Web Contexts) the ServletContext object.
${session.foo}
3)、内置的一些工具对象:
Selection Variable Expressions: {...}:选择表达式:和${}在功能上是一样;
补充:配合 th:object="${session.user}:
<div th:object="${session.user}">
<p>Name: <span th:text="{firstName}">Sebastian</span>.</p>
<p>Surname: <span th:text="{lastName}">Pepper</span>.</p>
<p>Nationality: <span th:text="{nationality}">Saturn</span>.</p>
</div>
Message Expressions: #{...}:获取国际化内容
Link URL Expressions: @{...}:定义URL;
@{/order/process(execId=${execId},execType='FAST')}
Fragment Expressions: ~{...}:片段引用表达式
<div th:insert="~{commons :: main}">...</div>
Literals(字面量)
Text literals: 'one text' , 'Another one!' ,…
Number literals: 0 , 34 , 3.0 , 12.3 ,…
Boolean literals: true , false
Null literal: null
Literal tokens: one , sometext , main ,…
Text operations:(文本操作)
String concatenation: +
Literal substitutions: |The name is ${name}|
Arithmetic operations:(数学运算)
Binary operators: + , - , * , / , %
Minus sign (unary operator): -
Boolean operations:(布尔运算)
Binary operators: and , or
Boolean negation (unary operator): ! , not
Comparisons and equality:(比较运算)
Comparators: > , < , >= , <= ( gt , lt , ge , le )
Equality operators: == , != ( eq , ne )
Conditional operators:条件运算(三元运算符)
If-then: (if) ? (then)
If-then-else: (if) ? (then) : (else)
Default: (value) ?: (defaultvalue)
Special tokens:
No-Operation: _
注意:内容过多,详细内容参考官方文档。
示例:↓
HelloController:
package com.keafmd.springboot.controller;
import org.springframework.stereotype.Controller;
import org.springframework.web.bind.annotation.RequestMapping;
import org.springframework.web.bind.annotation.ResponseBody;
import java.util.Arrays;
import java.util.Map;
/*
Keafmd
@ClassName: HelloController
@Description:
@author: 牛哄哄的柯南
@date: 2021-03-04 19:54
/
@Controller
public class HelloController {
@ResponseBody
@RequestMapping("/hello")
public String hello(){
return "Hello World";
}
/*
查出一些数据在页面显示
@param map
@return
*/
@RequestMapping("/success")
public String success(Map<String,Object> map) {
map.put("hello","你好");
map.put("hello1","<h1>你好</h1>");
map.put("users", Arrays.asList("柯南","小兰","基德"));
return "success";
}
}
success.html:
<!DOCTYPE html>
<html lang="en" xmlns:th="http://www.thymeleaf.org">
<head>
<meta charset="UTF-8">
<title>Title</title>
</head>
<body>
<h1>成功</h1>
<!--th:text 将div里面的文本内容设置为-->
<div id="div01" class="myDiv" th:id="${hello}" th:class="${hello}" th:text="${hello}">这里的内容被覆盖</div>
<hr/>
<div th:text="${hello1}"></div>
<div th:utext="${hello1}"></div>
<hr/>
<!--th:each 每次遍历都会生成当前这个标签-->
<h4 th:text="${user}" th:each="user:${users}"></h4>
<hr/>
<h4>
<span th:each="user:${users}"> [[${user}]] </span>
</h4>
</body>
</html>
效果:
四、SpringMVC自动配置
1、Spring MVC auto-configuration
参考官方文档:点这里
Spring Boot 自动配置好了SpringMVC
以下是SpringBoot对SpringMVC的默认配置:(WebMvcAutoConfiguration)
Inclusion of ContentNegotiatingViewResolver and BeanNameViewResolver beans.
自动配置了ViewResolver(视图解析器:根据方法的返回值得到视图对象(View),视图对象决定如何渲染(转发?重定向?))
ContentNegotiatingViewResolver:组合所有的视图解析器的。
如何定制:我们可以自己给容器中添加一个视图解析器;自动的将其组合进来。
Support for serving static resources, including support for WebJars (see below).静态资源文件夹路径,webjars
Static index.html support. 静态首页访问
Custom Favicon support (see below). favicon.ico
自动注册了 of Converter, GenericConverter, Formatter beans.
Converter:转换器; public String hello(User user):类型转换使用Converter
Formatter :格式化器; 2017.12.17===Date
@Bean
@ConditionalOnProperty(prefix = "spring.mvc", name = "date-format")//在文件中配置日期格式化的规则
public Formatter<Date> dateFormatter() {
return new DateFormatter(this.mvcProperties.getDateFormat());//日期格式化组件
}
1
2
3
4
5
自己添加的格式化器转换器,我们只需要放在容器中即可
Support for HttpMessageConverters (see below).
HttpMessageConverter:SpringMVC用来转换Http请求和响应的;User—Json
HttpMessageConverters 是从容器中确定;获取所有的HttpMessageConverter
自己给容器中添加HttpMessageConverter,只需要将自己的组件注册容器中(@Bean,@Component)
Automatic registration of MessageCodesResolver (see below):定义错误代码生成规则
Automatic use of a ConfigurableWebBindingInitializer bean (see below).
我们可以配置一个ConfigurableWebBindingInitializer来替换默认的(添加到容器)
初始化WebDataBinder
请求数据=====JavaBean
1
2
org.springframework.boot.autoconfigure.web:web的所有自动场景
If you want to keep Spring Boot MVC features, and you just want to add additional MVC configuration (interceptors, formatters, view controllers etc.) you can add your own @Configuration class of type WebMvcConfigurerAdapter, but without @EnableWebMvc. If you wish to provide custom instances of RequestMappingHandlerMapping, RequestMappingHandlerAdapter or ExceptionHandlerExceptionResolver you can declare a WebMvcRegistrationsAdapter instance providing such components.
如果你想保持Spring Boot MVC 功能,你只是想添加额外的(MVC配置)(https://docs.spring.io/spring/docs/4.3.14.RELEASE/spring-framework-reference/htmlsingle MVC)(拦截器,格式器,视图控制器等)您可以添加自己的@ configuration类WebMvcConfigurerAdapter类型,但没有@EnableWebMvc。如果你想提供RequestMappingHandlerMapping, RequestMappingHandlerAdapter或ExceptionHandlerExceptionResolver的自定义实例,你可以声明一个WebMvcRegistrationsAdapter实例来提供这样的组件。
If you want to take complete control of Spring MVC, you can add your own @Configuration annotated with @EnableWebMvc.
如果你想完全控制Spring MVC,你可以添加你自己的@Configuration注解@EnableWebMvc。
2、扩展SpringMVC
实现如下功能:
<mvc:view-controller path="/hello" view-name="success"></mvc:view-controller>
<mvc:interceptors>
<mvc:interceptor>
<mvc:mapping path="/hello"/>
<bean></bean>
</mvc:interceptor>
</mvc:interceptors>
做法:编写一个配置类(@Configuration),是WebMvcConfigurerAdapter类型;不能标注@EnableWebMvc
特点:既保留了所有的自动配置,也能用我们扩展的配置。
在config包下创建个MyMvcConfig。
代码实现:
package com.keafmd.springboot.config;
import org.springframework.context.annotation.Configuration;
import org.springframework.web.servlet.config.annotation.ViewControllerRegistry;
import org.springframework.web.servlet.config.annotation.WebMvcConfigurer;
/*
Keafmd
@ClassName: MyMvcConfig
@Description:
@author: 牛哄哄的柯南
@date: 2021-03-17 20:26
/
@Configuration
public class MyMvcConfig implements WebMvcConfigurer {
@Override
public void addViewControllers(ViewControllerRegistry registry) {
//浏览器发送 /keafmd 请求 来到success页面
registry.addViewController("/keafmd").setViewName("success");
}
}
原理
1、WebMvcAutoConfiguration是SpringMVC的自动配置类。
2、在做其他自动配置时会导入,@Import(EnableWebMvcConfiguration.class)。
@Configuration
public static class EnableWebMvcConfiguration extends DelegatingWebMvcConfiguration {
private final WebMvcConfigurerComposite configurers = new WebMvcConfigurerComposite();
//从容器中获取所有的WebMvcConfigurer
@Autowired(required = false)
public void setConfigurers(List<WebMvcConfigurer> configurers) {
if (!CollectionUtils.isEmpty(configurers)) {
this.configurers.addWebMvcConfigurers(configurers);
//一个参考实现;将所有的WebMvcConfigurer相关配置都来一起调用;
@Override
// public void addViewControllers(ViewControllerRegistry registry) {
// for (WebMvcConfigurer delegate : this.delegates) {
// delegate.addViewControllers(registry);
// }
}
}
}
3、容器中所有的WebMvcConfigurer都会一起起作用。
4、我们的配置类也会被调用。
效果:SpringMVC的自动配置和我们的扩展配置都会起作用。
3、全面接管SpringMVC
SpringBoot对SpringMVC的自动配置不需要了,所有都是我们自己配置,所有的SpringMVC的自动配置都失效了。
做法:我们需要在配置类中添加@EnableWebMvc即可。
@EnableWebMvc
@Configuration
public class MyMvcConfig implements WebMvcConfigurer {
@Override
public void addViewControllers(ViewControllerRegistry registry) {
//浏览器发送 /keafmd 请求 来到success页面
registry.addViewController("/keafmd").setViewName("success");
}
}
全面接管后,静态资源失效。
不推荐这样全面接管。
原理
加了@EnableWebMvc自动配置就失效了。
1、@EnableWebMvc的核心:
@Import({DelegatingWebMvcConfiguration.class})
public @interface EnableWebMvc {
2、DelegatingWebMvcConfiguration
@Configuration(
proxyBeanMethods = false
)
public class DelegatingWebMvcConfiguration extends WebMvcConfigurationSupport {
3、WebMvcAutoConfiguration
@Configuration(
proxyBeanMethods = false
)
@ConditionalOnWebApplication(
type = Type.SERVLET
)
@ConditionalOnClass({Servlet.class, DispatcherServlet.class, WebMvcConfigurer.class})
//容器中没有这个组件的时候,这个自动配置类才生效
@ConditionalOnMissingBean({WebMvcConfigurationSupport.class})
@AutoConfigureOrder(-2147483638)
@AutoConfigureAfter({DispatcherServletAutoConfiguration.class, TaskExecutionAutoConfiguration.class, ValidationAutoConfiguration.class})
public class WebMvcAutoConfiguration {
4、@EnableWebMvc将WebMvcConfigurationSupport组件导入进来,自动配置类失效了。
5、导入的WebMvcConfigurationSupport只是SpringMVC最基本的功能。
五、如何修改SpringBoot的默认配置
1、SpringBoot在自动配置很多组件的时候,先看容器中有没有用户自己配置的(@Bean、@Component)如果有就用用户配置的,如果没有,才自动配置;如果有些组件可以有多个(ViewResolver)将用户配置的和自己默认的组合起来。
2、在SpringBoot中会有非常多的xxxConfigurer帮助我们进行扩展配置。
3、在SpringBoot中会有很多的xxxCustomizer帮助我们进行定制配置。
以上就是SpringBoot与Web开发(超详细)篇一的全部内容。
————————————————
版权声明:本文为CSDN博主「牛哄哄的柯南」的原创文章,遵循CC 4.0 BY-SA版权协议,转载请附上原文出处链接及本声明。
原文链接:https://blog.csdn.net/weixin_43883917/article/details/114375472
蓝蓝设计( www.lanlanwork.com )是一家专注而深入的界面设计公司,为期望卓越的国内外企业提供卓越的UI界面设计、BS界面设计 、 cs界面设计 、 ipad界面设计 、 包装设计 、 图标定制 、 用户体验 、交互设计、 网站建设 、平面设计服务
这个项目在2019年立项,在2020年完成,项目进行中又几番变动,万幸最终还是完成了!
非常感谢团队中的小伙伴给予的帮助,能够与你们一起共事非常幸运!
------------------------------------------------------------------
*本次输出非100%与最终上线稿件相同,有部分设计因开发成本与项目预算原因未能实现!
*部分商品图片来源于网络,仅作为展示与交流使用!
------------------------------------------------------------------


转自:站酷
作者:火龙果_pitaya
蓝蓝设计( www.lanlanwork.com )是一家专注而深入的界面设计公司,为期望卓越的国内外企业提供卓越的UI界面设计、BS界面设计 、 cs界面设计 、 ipad界面设计 、 包装设计 、 图标定制 、 用户体验 、交互设计、 网站建设 、平面设计服务
蓝蓝 http://www.lanlanwork.com