写在前面
vue文件最后要空一行,不然会报错,真的奇葩…
登录概述
登录业务流程
-
1.在登录页面输入用户名和密码
-
2.调用后台接口进行验证
-
3.通过验证之后,根据后台得响应状态跳转到项目主页
登录业务的相关技术点
-
http是无状态的
-
通过cookie在客户端记录状态
-
通过session在服务器端记录状态
-
通过token方式维持状态
这里要清楚哦!
登录—token原理分析
-
1.登录页面输入用户名和密码进行登录
-
2.服务器验证通过之后生成该用户的token并返回
-
3.客户端存储该token
-
4.后续所有的请求都携带该token发送请求
-
5.服务器端验证token是否通过
登录功能实现
登录页面的布局
通过Element-UI组件实现布局
-
el-form
-
el-form-item
-
el-input
-
el-button
-
字体图标
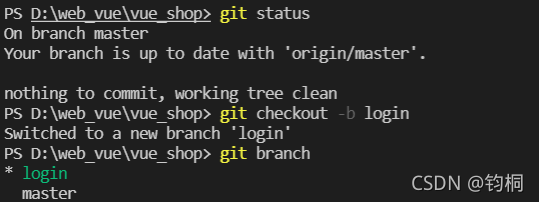
在vscode打开终端ctrl+~
git status 查看当前git状态
git checkout -b login 创建一个新的分支叫login
git branch 切换分支
在vue ui中启动!

终端指令npm run serve也可以运行!
在components文件下创建一个vue文件
import Vue from 'vue' import VueRouter from 'vue-router' import login from './components/login.vue' Vue.use(VueRouter) const routes = [ {path:'/login',component:login} ] const router = new VueRouter({ routes }) export default router
-
1
-
2
-
3
-
4
-
5
-
6
-
7
-
8
-
9
-
10
-
11
-
12
-
13
-
14
-
15
配置路由(并添加路由重定向)
const router = new VueRouter({ routes: [ { path: '/', redirect: '/login' }, { path: '/login', component: login } ] })
-
1
-
2
-
3
-
4
-
5
-
6
-
7
-
8
-
9
-
10
-
11
-
12
一定要注意空格,不然会报错,可恶啊!
页面编写
先给一个全局样式表
html, body, #app{ height: 100%; margin: 0; padding: 0; }
并在main.js中导入
import './assets/css/global.css'
完成登录框居中
注意:translate 进行移动,完成真正的居中
.login_box{ width: 450px; height: 300px; background-color: #fff; position: absolute; left: 50%; top: 50%; transform: translate(-50%,-50%); }

添加一个登录图标
 .avatar_box{ height: 130px; width: 130px; border: 1px solid #eee; border-radius: 50%; padding: 10px; box-shadow: 0px 0px 10px #ddd; position: absolute; left: 50%; transform: translate(-50%,-50%); background-color: #fff;
        img{ width: 100%; height: 100%; border-radius: 50%; background-color: #eee; } }
-
1
-
2
-
3
-
4
-
5
-
6
-
7
-
8
-
9
-
10
-
11
-
12
-
13
-
14
-
15
-
16
-
17
-
18
登录表单的布局
通过Element-UI组件实现布局
-
el-form
-
el-form-item
-
el-input
-
el-button
-
字体图标
elements组件库网页
在网站里面可以找到一些可以使用的基础模板代码
导入组件
import Vue from 'vue'
import { Button, Form, FormItem, Input } from 'element-ui'//分开import会报错

Vue.use(Button) Vue.use(Form) Vue.use(FormItem) Vue.use(Input)
中间form和button都是直接到上面的组件库里面去找的
中间一些代码不贴了,比较枯燥呀
特别地,我们的小图标是从阿里的icon库里面下载的
具体用法见以前写得一篇博客
阿里巴巴icon图标尽在掌握(前端如何引入icon库,美丽图标随你处置T.T)

登录表单的数据绑定
-
1.:model=“loginForm” 绑定一个表单
-
2.在form-item中用v-model双向绑定数据对象
-
3.在export default中data() return表单数据
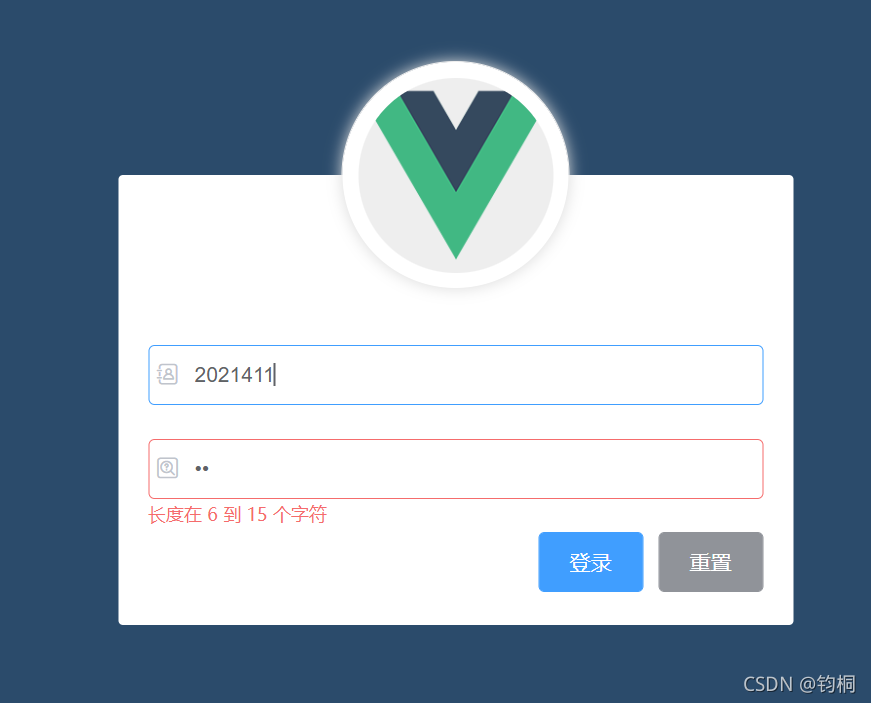
登录表单的验证规则
-
1.:rules="ruleForm"绑定一个规则
-
2.在form-item中用prop属性设置为需要校验的字段名
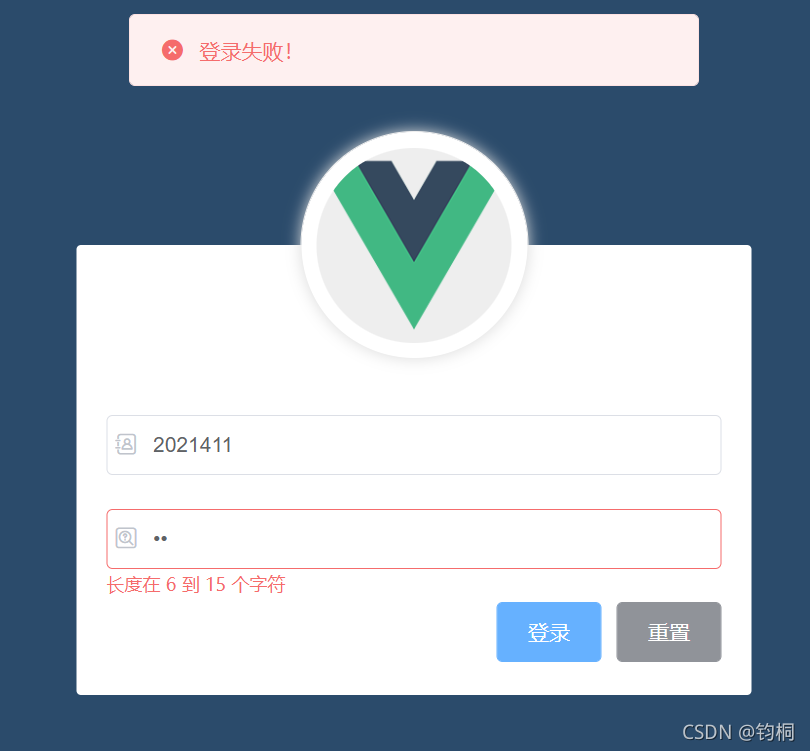
loginFormRules: { username: [ { required: true, message: '请输入登录名称', trigger: 'blur' }, { min: 3, max: 10, message: '长度在 3 到 10 个字符', trigger: 'blur' } ], password: [ { required: true, message: '请输入登录密码', trigger: 'blur' }, { min: 6, max: 15, message: '长度在 6 到 15 个字符', trigger: 'blur' } ] }
-
1
-
2
-
3
-
4
-
5
-
6
-
7
-
8
-
9
-
10
-
11
-
12
-
13
-
14
登录表单的重置
-
1.在el-form中添加ref引用名称,以便获取表单
-
2.在方法中添加方法,用
this.$refs.loginFormRef.resetFields()来重置表单,注意表单的值会变为data里面设置的初值
登录预验证
-
1.同样的
this.$refs.loginFormRef.validate()
-
2.配置axios
import axios from 'axios' axios.defaults.baseURL = 'https://127.0.0.1:8888/api/private/v1/' Vue.prototype.$http = axios
-
3.如下获取查询的结果
使用async 和await要获取返回结果
this.$refs.loginFormRef.validate(async valid => { if (!valid) return const { data: res } = await this.$http.post('login', this.loginForm) console.log(res) if (res.meta.status !== 200) return console.log('登录失败') console.log('登录成功') })
登录组件配置弹窗提示
-
1.在element.js中引入message并挂载到vue上
Vue.prototype.$message = Message
-
2.直接调用this.$message.error(‘登录失败!’)
登录成功后的行为
1.将登录之后的token,保存到客户端的sessionStorage中
-
1.项目中除了登录之外的其他API接口,必须在登录之后才能访问
-
2.token只应在当前网站打开期间生效,所以将token保存在sessionStorage中
将这个token存储到了会话存储中