首页

Vue开发聊天界面

前端达人

Vue开发聊天界面(一)

最近业务里面有个需求就是开发一个类似微信的聊天页面的H5,不需要像微信那么复杂,但是得有个样子,弄了半天之后终于有了个样子。决定写个博客记一下这个过程,希望后续不会鸽

组件拆分

拆了3个,打字的,聊天item,聊天list。大概就这样了

其中聊天list 用了一个better-scroll这个第三方插件。

首先第一步就是开发这个聊天item

聊天item 开发

分析一下需求,别人发过来的和我们发过去的是两个排版和样式,但是不用单独写两个,用个逻辑区分一下就可以了,也可以动态绑定css什么的差别很小。

<template> <div class="record-wrapper"> <!-- 时间,后续开发 --> <div class="time"></div> <!-- 消息, msg通用样式 msg-right/msg-left 区分排版左右 --> <div v-if="from == 1" class="msg msg-right"> <div class="img-wrapper"> <img class="img" :src="from1" /> </div> <!-- 消息框, msg通用样式 message-wrapper-right/left 区分聊天框颜色 --> <div class="message-wrapper message-wrapper-right"> <div class="message">{{ message }}</div> </div> </div> </div> </template> 

这个是只有1边的,逻辑就是在消息那边加个v-if,判断来源,也可以动态绑定css

弄好以后就这样

<template> <div class="record-wrapper"> <div class="time"></div> <div v-if="from == 1" class="msg msg-right"> <div class="img-wrapper"> <img class="img" :src="from1" /> </div> <div class="message-wrapper message-wrapper-right"> <div class="message">{{ message }}</div> </div> </div> <div v-else class="msg msg-left"> <div class="img-wrapper"> <img class="img" :src="from2" /> </div> <div class="message-wrapper message-wrapper-left"> <div class="message">{{ message }}</div> </div> </div> </div> </template> <script> export default {
  name: "",
  props: {
    from: Number, // 1: 自己    2: 别人
    message: String,
    timestamp: Date,
  },
  data() {
    return {
      from1: require("../../../assets/imgs/from1.jpg"),
      from2: require("../../../assets/imgs/from2.jpg"),
    };
  },
}; </script> 

个人觉得css还是比较重要的,这里用了sass来写。主要解决方案就是用一个display:flex配合上flex-direction: row-reverse让头像和消息左右排列

<style lang="scss" scoped> .record-wrapper { margin: 4px; padding: 4px; } .time { text-align: center; } .msg { display: flex; flex-direction: row; .message-wrapper { max-width: 220px; margin: 0px 10px 0px 10px; .message { margin: 8px; word-wrap: break-word; //英文换行 } } .message-wrapper-left { background-color: lightslategray; border-radius: 0px 12px 12px 12px; } .message-wrapper-right { background-color: powderblue; border-radius: 12px 0px 12px 12px; } .img { flex: auto; height: 36px; width: 36px; border-radius: 8px; } } .msg-right { flex-direction: row-reverse; } .msg-left { flex-direction: row; } </style> 

这个是没有调样式的,只是为了自己嗨弄的,可能会很丑。
最后大概就是这样的

Vue开发聊天界面(二)

我开发好了一个聊天的item,可以根据发送方和接收方来分别渲染一个item,这一章我把他们放在一个list的界面里面,让一串item构成一个聊天页面,并且这个聊天页面能够上下滚动。

其实我觉得很简单,难点就2个。首先是滑动,这里用了better-scroll这个组件,可以在网上搜,挺好用的。另一个就是页面布局的问题,写点css还是没得问题的。
首先去better-scroll的官网,按着他的核心逻辑抄一下。不详细谈了,总之来说,会有三层嵌套。我个人命名他们为: wrapper 和content和 item 这三层。
先弄一个json,当做会被填充的数据。

export const chatItems = [ { type:1, message:"fdaf地方撒风大撒风阿斯顿飞fd阿斯顿飞安德森发大水发大水发大水奋斗发的大撒风安德森 发大发大水发", from:1, timestamp: new Date() }, { type:1, message:"fdaf地方撒风大撒aa风阿斯顿飞ffdsafsfadsfadsfjlkjsadflkosdajfl asdjlffsaf水奋斗发的大撒风安德森 发大发大水发", from:1, timestamp: new Date() }, { type:1, message:"做紧d咩嘢?", from:2, timestamp: new Date() }, { type:1, message:"???", from:2, timestamp: new Date() }, ] 

然后开始写vue的代码

<template> <div class="scroll-wrapper" ref="scroll"> <div class="scroll-content"> <chat-item v-for="item in chatItems" :key="item.message" :type="item.type" :message="item.message" :timestamp="item.timestamp" :from="item.from" ></chat-item> </div> </div> </template> <script> import BScroll from "@better-scroll/core";
import MouseWheel from "@better-scroll/mouse-wheel"
import ChatItem from "./ChatItem";
import { chatItems } from "../../../assets/data/items";

BScroll.use(MouseWheel)

export default {
  name: "",
  data() {
    return {
      chatItems,
      bs: null
    };
  },
  components: {
    "chat-item": ChatItem,
  },

  mounted() {
    this.init();
  },
  beforeDestroy() {
    this.bs.destroy();
  },
  methods: {
    // better-scroll的代码
    init() {
      this.bs = new BScroll(this.$refs.scroll, {
        scrollY: true, // 上下滚动
        click: true,   // 开启点击事件
        startY: document.querySelector(".scroll-wrapper").clientHeight - this.$refs.scroll.scrollHeight + 5 , // 初始高度
        mouseWheel: true,   // 鼠标滚动
        probeType: 2, // listening scroll hook
      });

      // 下面的不要也行,官网抄的顺便留下来了
      this.bs.on("scroll", ({ y }) => {
        console.log("scrolling:" + y);
      });
      this.bs.on("scrollEnd", () => {
        console.log("scrollingEnd");
      });
    },
    clickHandler(item) {
      alert(item);
    },
  },
}; </script> <style lang="scss" scoped> .scroll-wrapper {
  height: calc(100% - 160px);  // 留一些空间给 打字的地方 和 header
  overflow: hidden;    // 非常之关键
} </style> 

最后是这个样子的了

蓝蓝设计建立了UI设计分享群,每天会分享国内外的一些优秀设计,如果有兴趣的话,可以进入一起成长学习,请扫码ben_lanlan,报下信息,会请您入群。欢迎您加入噢~~希望得到建议咨询、商务合作,也请与我们联系。

文章来源:简书。作者:Good_Nine9

分享此文一切功德,皆悉回向给文章原作者及众读者.
免责声明:蓝蓝设计尊重原作者,文章的版权归原作者。如涉及版权问题,请及时与我们取得联系,我们立即更正或删除。

蓝蓝设计( www.lanlanwork.com )是一家专注而深入的界面设计公司,为期望卓越的国内外企业提供卓越的UI界面设计、BS界面设计 、 cs界面设计 、 ipad界面设计 、 包装设计 、 图标定制 、 用户体验 、交互设计、 网站建设 、平面设计服务


WebSocket 百科

前端达人

WebSocket是一种在单个TCP连接上进行全双工通信的协议。WebSocket通信协议于2011年被IETF定为标准RFC 6455,并由RFC7936补充规范。WebSocket API也被W3C定为标准。
WebSocket使得客户端和服务器之间的数据交换变得更加简单,允许服务端主动向客户端推送数据。在WebSocket API中,浏览器和服务器只需要完成一次握手,两者之间就直接可以创建持久性的连接,并进行双向数据传输。
中文名
WebSocket
外文名
WebSocket
解    释
基于TCP的全双工通信协议
优    点
服务器可以主动传送数据给客户端
功    能
实现了浏览器与服务器全双工通信

目录

背景

 语音
很多网站为了实现推送技术,所用的技术都是轮询。轮询是在特定的的时间间隔(如每1秒),由浏览器对服务器发出HTTP请求,然后由服务器返回最新的数据给客户端的浏览器。这种传统的模式带来很明显的缺点,即浏览器需要不断的向服务器发出请求,然而HTTP请求可能包含较长的头部,其中真正有效的数据可能只是很小的一部分,显然这样会浪费很多的带宽等资源。
而比较新的技术去做轮询的效果是Comet。这种技术虽然可以双向通信,但依然需要反复发出请求。而且在Comet中,普遍采用的长链接,也会消耗服务器资源。
在这种情况下,HTML5定义了WebSocket协议,能更好的节省服务器资源和带宽,并且能够更实时地进行通讯。

优点

 语音
  • 较少的控制开销。在连接创建后,服务器和客户端之间交换数据时,用于协议控制的数据包头部相对较小。在不包含扩展的情况下,对于服务器到客户端的内容,此头部大小只有2至10字节(和数据包长度有关);对于客户端到服务器的内容,此头部还需要加上额外的4字节的掩码。相对于HTTP请求每次都要携带完整的头部,此项开销显著减少了。
  • 更强的实时性。由于协议是全双工的,所以服务器可以随时主动给客户端下发数据。相对于HTTP请求需要等待客户端发起请求服务端才能响应,延迟明显更少;即使是和Comet等类似的长轮询比较,其也能在短时间内更多次地传递数据。
  • 保持连接状态。与HTTP不同的是,Websocket需要先创建连接,这就使得其成为一种有状态的协议,之后通信时可以省略部分状态信息。而HTTP请求可能需要在每个请求都携带状态信息(如身份认证等)。
  • 更好的二进制支持。Websocket定义了二进制帧,相对HTTP,可以更轻松地处理二进制内容。
  • 可以支持扩展。Websocket定义了扩展,用户可以扩展协议、实现部分自定义的子协议。如部分浏览器支持压缩等。
  • 更好的压缩效果。相对于HTTP压缩,Websocket在适当的扩展支持下,可以沿用之前内容的上下文,在传递类似的数据时,可以显著地提高压缩率。

握手协议

 语音
WebSocket 是独立的、创建在 TCP 上的协议。
Websocket 通过HTTP/1.1 协议的101状态码进行握手。
为了创建Websocket连接,需要通过浏览器发出请求,之后服务器进行回应,这个过程通常称为“握手”(handshaking)。


蓝蓝设计建立了UI设计分享群,每天会分享国内外的一些优秀设计,如果有兴趣的话,可以进入一起成长学习,请扫码ben_lanlan,报下信息,会请您入群。欢迎您加入噢~~希望得到建议咨询、商务合作,也请与我们联系。

分享此文一切功德,皆悉回向给文章原作者及众读者.
免责声明:蓝蓝设计尊重原作者,文章的版权归原作者。如涉及版权问题,请及时与我们取得联系,我们立即更正或删除。

蓝蓝设计( www.lanlanwork.com )是一家专注而深入的界面设计公司,为期望卓越的国内外企业提供卓越的UI界面设计、BS界面设计 、 cs界面设计 、 ipad界面设计 、 包装设计 、 图标定制 、 用户体验 、交互设计、 网站建设 、平面设计服务


VUE 设置定时器和清理定时器

前端达人

使用钩子函数对定时器进行清理,失败了,

1、在data中声明要设置的定时器名称:


  1. data() {
  2. return {
  3. timer: null // 定时器名称
  4. }
  5. },复制代码

2、在mounted中创建定时器:


  1. this.timer = (() => {
  2. // 某些操作
  3. }, 5000)复制代码

3、在页面注销时清理定时器:


  1. beforeDestroy() {
  2. clearInterval(this.timer);
  3. this.timer = null;
  4. }复制代码

然鹅,并没什么卵用,在切换页面后,定时任务依然顽强的奔跑着。


  1. beforeDestroy() {
  2. clearInterval(this.timer);
  3. this.timer = null;
  4. console.log(this.timer) //输出为: null,但是任务依然在继续运行
  5. }复制代码

可能是我的姿势不对吧。害羞.jpg

经过在各大论坛一番查找发现:

通过$once这个事件侦听器在定义完定时器之后的位置来清除定时器:


  1. const timer = setInterval(() =>{
  2. // 某些定时器操作
  3. }, 5000);
  4. // 通过$once来监听定时器
  5. // 在beforeDestroy钩子触发时清除定时器
  6. this.$once('hook:beforeDestroy', () => {
  7. clearInterval(timer);
  8. }) 复制代码

哇,成功了...


蓝蓝设计建立了UI设计分享群,每天会分享国内外的一些优秀设计,如果有兴趣的话,可以进入一起成长学习,请扫码ben_lanlan,报下信息,会请您入群。欢迎您加入噢~~希望得到建议咨询、商务合作,也请与我们联系。

文章来源:csdn

分享此文一切功德,皆悉回向给文章原作者及众读者.
免责声明:蓝蓝设计尊重原作者,文章的版权归原作者。如涉及版权问题,请及时与我们取得联系,我们立即更正或删除。

蓝蓝设计( www.lanlanwork.com )是一家专注而深入的界面设计公司,为期望卓越的国内外企业提供卓越的UI界面设计、BS界面设计 、 cs界面设计 、 ipad界面设计 、 包装设计 、 图标定制 、 用户体验 、交互设计、 网站建设 、平面设计服务


textarea去掉右下角的条纹

前端达人

resize:none

<textarea style="resize:none " rows="8" cols="80" ></textarea> 
  • 1

在这里插入图片描述

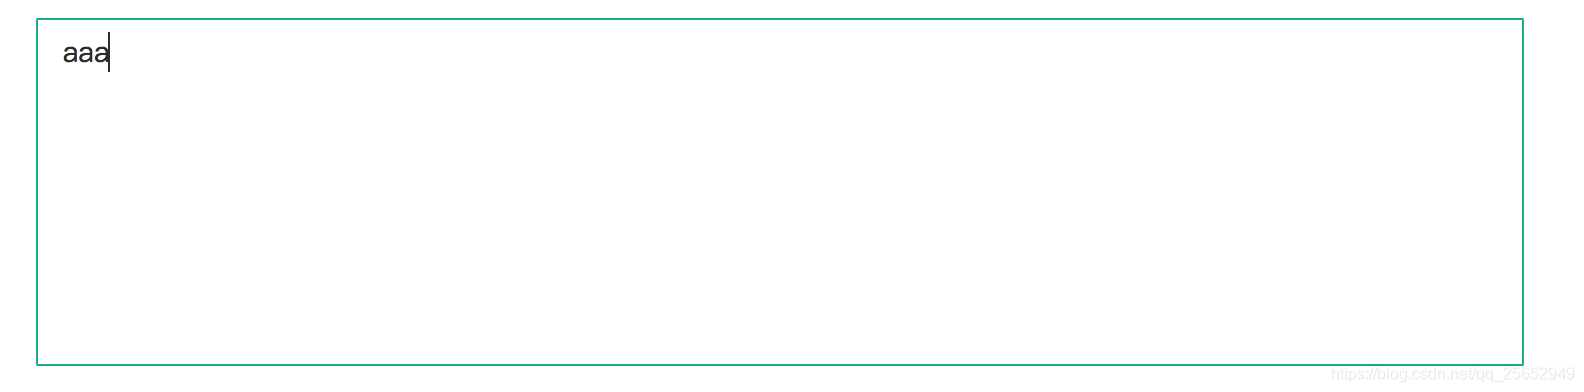
如果你使用谷歌浏览器或火狐浏览器,你会发现页面上的textarea元素的右下角有个小三角,用鼠标箭头拖拽它,你的textarea就能随着放大或缩小。这是现代浏览器为方便用户而添加的一个辅助功能(很遗憾,不包括IE,如果你使用IE,是看不到的。)。Web程序员在设计网页时,一般给了textarea一个固定的长宽,通常是配合布局而设定。但挑剔的用户往往会认为太小或太大。有了这个可以调整大小的工具后,用户就可以自己选择合适的大小了。

但是,有时候是应用的需要,Web程序员需要禁止这个可以调整textarea大小的功能(IE完全没这个问题!),也就是去掉右下角的小三角,有什么办法呢?很简单,使用CSS的resize属性。


  1. <style type="text/css">
  2. textarea {
  3. resize: none;
  4. }
  5. </style>
将 resize 属性设置为 none , textarea 就变成了固定大小,小三角也消失了

蓝蓝设计建立了UI设计分享群,每天会分享国内外的一些优秀设计,如果有兴趣的话,可以进入一起成长学习,请扫码ben_lanlan,报下信息,会请您入群。欢迎您加入噢~~希望得到建议咨询、商务合作,也请与我们联系。

文章来源:csdn

分享此文一切功德,皆悉回向给文章原作者及众读者.
免责声明:蓝蓝设计尊重原作者,文章的版权归原作者。如涉及版权问题,请及时与我们取得联系,我们立即更正或删除。

蓝蓝设计( www.lanlanwork.com )是一家专注而深入的界面设计公司,为期望卓越的国内外企业提供卓越的UI界面设计、BS界面设计 、 cs界面设计 、 ipad界面设计 、 包装设计 、 图标定制 、 用户体验 、交互设计、 网站建设 、平面设计服务

引入echars5.0报错“export ‘default‘ (imported as ‘echarts‘) was not found in ‘echarts‘

前端达人

问题

引入 echars 5.0 遇到报错 "export ‘default’ (imported as ‘echarts’) was not found in ‘echarts’

解决

引入方式改为

import * as echarts from 'echarts'; // 或 const echarts = require('echarts'); 
            
  • 1
  • 2
  • 3


简单粗暴 快速解决

蓝蓝设计建立了UI设计分享群,每天会分享国内外的一些优秀设计,如果有兴趣的话,可以进入一起成长学习,请扫码ben_lanlan,报下信息,会请您入群。欢迎您加入噢~~希望得到建议咨询、商务合作,也请与我们联系。

文章来源:csdn

分享此文一切功德,皆悉回向给文章原作者及众读者.
免责声明:蓝蓝设计尊重原作者,文章的版权归原作者。如涉及版权问题,请及时与我们取得联系,我们立即更正或删除。

蓝蓝设计( www.lanlanwork.com )是一家专注而深入的界面设计公司,为期望卓越的国内外企业提供卓越的UI界面设计、BS界面设计 、 cs界面设计 、 ipad界面设计 、 包装设计 、 图标定制 、 用户体验 、交互设计、 网站建设 、平面设计服务


CSS3 元素转圈动画 (元素旋转动画)

前端达人

<!DOCTYPE html> <html lang="en"> <head> <meta charset="UTF-8"> <meta name="viewport" content="width=device-width, initial-scale=1.0"> <meta http-equiv="X-UA-Compatible" content="ie=edge"> <title>css 转圈</title> <style> .turn{ width:100px; height: 100px; background: aqua; animation:turn 1s linear infinite; margin: 100px auto; } /* turn : 定义的动画名称
      1s : 动画时间
      linear : 动画以何种运行轨迹完成一个周期
      infinite :规定动画应该无限次播放 */ @keyframes turn{ 0%{-webkit-transform:rotate(0deg);} 25%{-webkit-transform:rotate(90deg);} 50%{-webkit-transform:rotate(180deg);} 75%{-webkit-transform:rotate(270deg);} 100%{-webkit-transform:rotate(360deg);} } </style> </head> <body> <div class="turn"></div> </body> </html>
复制代码


分类: CSS


蓝蓝设计建立了UI设计分享群,每天会分享国内外的一些优秀设计,如果有兴趣的话,可以进入一起成长学习,请扫码ben_lanlan,报下信息,会请您入群。欢迎您加入噢~~希望得到建议咨询、商务合作,也请与我们联系。

文章来源:博客园

分享此文一切功德,皆悉回向给文章原作者及众读者. 免责声明:蓝蓝设计尊重原作者,文章的版权归原作者。如涉及版权问题,请及时与我们取得联系,我们立即更正或删除。

蓝蓝设计( www.lanlanwork.com )是一家专注而深入的界面设计公司,为期望卓越的国内外企业提供卓越的UI界面设计、BS界面设计 、 cs界面设计 、 ipad界面设计 、 包装设计 、 图标定制 、 用户体验 、交互设计、 网站建设 、平面设计服务

CSS3 元素转圈动画 (元素旋转动画)

前端达人

<!DOCTYPE html> <html lang="en"> <head> <meta charset="UTF-8"> <meta name="viewport" content="width=device-width, initial-scale=1.0"> <meta http-equiv="X-UA-Compatible" content="ie=edge"> <title>css 转圈</title> <style> .turn{ width:100px; height: 100px; background: aqua; animation:turn 1s linear infinite; margin: 100px auto; } /* turn : 定义的动画名称
      1s : 动画时间
      linear : 动画以何种运行轨迹完成一个周期
      infinite :规定动画应该无限次播放 */ @keyframes turn{ 0%{-webkit-transform:rotate(0deg);} 25%{-webkit-transform:rotate(90deg);} 50%{-webkit-transform:rotate(180deg);} 75%{-webkit-transform:rotate(270deg);} 100%{-webkit-transform:rotate(360deg);} } </style> </head> <body> <div class="turn"></div> </body> </html>
复制代码


分类: CSS


蓝蓝设计建立了UI设计分享群,每天会分享国内外的一些优秀设计,如果有兴趣的话,可以进入一起成长学习,请扫码ben_lanlan,报下信息,会请您入群。欢迎您加入噢~~希望得到建议咨询、商务合作,也请与我们联系。

文章来源:博客园

分享此文一切功德,皆悉回向给文章原作者及众读者. 免责声明:蓝蓝设计尊重原作者,文章的版权归原作者。如涉及版权问题,请及时与我们取得联系,我们立即更正或删除。

蓝蓝设计( www.lanlanwork.com )是一家专注而深入的界面设计公司,为期望卓越的国内外企业提供卓越的UI界面设计、BS界面设计 、 cs界面设计 、 ipad界面设计 、 包装设计 、 图标定制 、 用户体验 、交互设计、 网站建设 、平面设计服务

Vue中动画的实现 从基本动画,到炫酷动画。看这一篇就够了

前端达人

Vue中的基本动画实现

直接一点,基本动画的步骤

  1. 在需要加动画的地方,加入transition
<transition> <P v-if="isNum">我是一只小小鸟</P> </transition>  
  • 1
  • 2
  • 3

在style中写vue已定义好的类名

 进入前和结束后的状态
    .v-enter,.v-leave-to{ opacity: 0; transform: translateX(80px); } 进入和离开的动画时间段
    .v-enter-active,.v-leave-active{ transition: all 0.5S ease }  
  • 1
  • 2
  • 3
  • 4
  • 5
  • 6
  • 7
  • 8
  • 9
  • 10

这样就已经完成了基本动画了,上完整代码

<!DOCTYPE html> <html lang="en"> <head> <meta charset="UTF-8"> <meta name="viewport" content="width=device-width, initial-scale=1.0"> <meta http-equiv="X-UA-Compatible" content="ie=edge"> <title>Document</title> <script src="../node_modules/vue/dist/vue.min.js"></script> <style> 进入前和结束后的状态 .v-enter,.v-leave-to{ opacity: 0; transform: translateX(80px); } 进入和离开的动画时间段 .v-enter-active,.v-leave-active{ transition: all 0.5S ease } </style> </head> <body> <div id="box"> <button @click="tags">显示/隐藏</button> <transition> <P v-if="isNum">我是一只小小鸟</P> </transition> </div> <script> new Vue({ el:'#box', data:{ isNum :true }, methods: { tags(){ this.isNum=!this.isNum; } }, }) </script> </body> </html>  
  • 1
  • 2
  • 3
  • 4
  • 5
  • 6
  • 7
  • 8
  • 9
  • 10
  • 11
  • 12
  • 13
  • 14
  • 15
  • 16
  • 17
  • 18
  • 19
  • 20
  • 21
  • 22
  • 23
  • 24
  • 25
  • 26
  • 27
  • 28
  • 29
  • 30
  • 31
  • 32
  • 33
  • 34
  • 35
  • 36
  • 37
  • 38
  • 39
  • 40
  • 41
  • 42
  • 43
  • 44
  • 45
  • 46
  • 47
  • 48
  • 49
  • 50

动画类名的重定义

只需要在transition标签上添加一个name属性,然后把类名中v改成你定义的类名就可以了

<transition name='my'> <P v-if="isNum">我是一只小小鸟</P> </transition>  
  • 1
  • 2
  • 3
 进入前和结束后的状态
    .my-enter,.my-leave-to{ opacity: 0; transform: translateX(80px); } 进入和离开的动画时间段
    .my-enter-active,.my-leave-active{ transition: all 0.5S ease }  
  • 1
  • 2
  • 3
  • 4
  • 5
  • 6
  • 7
  • 8
  • 9
  • 10

使用第三方的动画库

第三方的动画库有很多
Animate、Anicollection、Cssshake、Animatable、Hover、Animations、JXAnimate、Spinkit、Velocity动画、AlloyStick骨骼动画引擎、Rocket、Cssynth、Stylie、Dynamicsjs、Anijs、Animsition、Parallax、Wow、Bouncejs、Easie、Greensock

我就选择其中一个库做示范其他都一样

  1. 在使用第三方库之前,需要在,你要做动画的标签上加个基本类
    animated,这个基本类是根据每个库不一样而定的,
    我们要用Animated,所以需要加
<transition name='my'> <P v-if="isNum" class="animated">我是一只小小鸟</P> </transition>  
  • 1
  • 2
  • 3

接着就是引入第三方库,你们可以下载。
我比较懒,我就直接npm下载了。

npm install animate.css --save  
  • 1

然后引入文件

<link rel="stylesheet" href="../node_modules/animated/lib/Animated.js">  
  • 1

写上类名,就行了,,提示,千万别下错文件,不然动画也无法实现

 <!-- 进入用lightSpeedIn    离开用 lightSpeedOut --> <transition enter-active-class="lightSpeedIn" leave-active-class ="lightSpeedOut"> <P v-if="isNum" class="animated">我是一只小小鸟</P> </transition>  
  • 1
  • 2
  • 3

蓝蓝设计建立了UI设计分享群,每天会分享国内外的一些优秀设计,如果有兴趣的话,可以进入一起成长学习,请扫码ben_lanlan,报下信息,会请您入群。欢迎您加入噢~~希望得到建议咨询、商务合作,也请与我们联系。

文章来源:csdn

分享此文一切功德,皆悉回向给文章原作者及众读者. 免责声明:蓝蓝设计尊重原作者,文章的版权归原作者。如涉及版权问题,请及时与我们取得联系,我们立即更正或删除。

<p style="box-sizing:border-box;margin-top:0px;margin-bottom:1rem;font-size:16px;font-variant-ligatures:no-common-ligatures;white-space:normal;background-color:#FFFFFF;text-align:justify;color:rgba(0, 0, 0, 0.84);font-family:&quot;letter-spacing:0.1px;">
    <strong style="box-sizing:border-box;font-size:14px;font-family:微软雅黑, Arial, Helvetica, sans-serif;color:#323232;"><b style="box-sizing:border-box;widows:1;"><b style="box-sizing:border-box;"><strong style="box-sizing:border-box;"><b style="box-sizing:border-box;"><strong style="box-sizing:border-box;"><b style="box-sizing:border-box;"><strong style="box-sizing:border-box;"><b style="box-sizing:border-box;"><strong style="box-sizing:border-box;"><b style="box-sizing:border-box;"><strong style="box-sizing:border-box;"><b style="box-sizing:border-box;"><strong style="box-sizing:border-box;"><b style="box-sizing:border-box;"><strong style="box-sizing:border-box;"><b style="box-sizing:border-box;"><strong style="box-sizing:border-box;"><b style="box-sizing:border-box;"><strong style="box-sizing:border-box;"><b style="box-sizing:border-box;"><strong style="box-sizing:border-box;"><b style="box-sizing:border-box;"><strong style="box-sizing:border-box;"><b style="box-sizing:border-box;"><strong style="box-sizing:border-box;"><b style="box-sizing:border-box;"><strong style="box-sizing:border-box;"><b style="box-sizing:border-box;"><strong style="box-sizing:border-box;"><b style="box-sizing:border-box;"><strong style="box-sizing:border-box;"><b style="box-sizing:border-box;"><strong style="box-sizing:border-box;"><b style="box-sizing:border-box;"><strong style="box-sizing:border-box;"><b style="box-sizing:border-box;"><strong style="box-sizing:border-box;"><b style="box-sizing:border-box;"><strong style="box-sizing:border-box;"><b style="box-sizing:border-box;"><strong style="box-sizing:border-box;"><b style="box-sizing:border-box;"><strong style="box-sizing:border-box;"><b style="box-sizing:border-box;"><b style="font-family:&quot;font-size:14px;background-color:#FFFFFF;white-space:normal;widows:1;line-111111111111111111111:20px;color:#3e3e3e;box-sizing:border-box !important;"><strong style="box-sizing:border-box;font-family:微软雅黑, Arial, Helvetica, sans-serif;"><b style="box-sizing:border-box;"><strong style="box-sizing:border-box;"><b style="box-sizing:border-box;"><strong style="box-sizing:border-box;"><b style="box-sizing:border-box;"><b style="box-sizing:border-box;"><b style="box-sizing:border-box;"><b style="box-sizing:border-box;"><b style="box-sizing:border-box;"><b style="box-sizing:border-box;"><i style="box-sizing:border-box;"><a href="http://www.lanlanwork.com/blog/admin" target="_blank" style="box-sizing:border-box;text-decoration-line:none;color:#886353;transition:all 0.5s ease 0s;">蓝蓝设计</a>(&nbsp;<a href="http://www.lanlanwork.com/" target="_blank" style="box-sizing:border-box;text-decoration-line:none;color:#0C386E;transition:all 0.5s ease 0s;vertical-align:baseline;background-position:0px -60px;padding:0px;margin:0px;text-indent:34px;">www.lanlanwork.com&nbsp;</a>)是一家专注而深入的<a href="http://www.lanlanwork.com/index.html" target="_blank" style="box-sizing:border-box;text-decoration-line:none;color:#886353;transition:all 0.5s ease 0s;background-position:0px -60px;padding:0px;margin:0px;">界面设计公司</a>,为期望卓越的国内外企业提供卓越的UI界面设计、<a href="http://www.lanlanwork.com/bs.html" style="box-sizing:border-box;text-decoration-line:none;color:#886353;transition:all 0.5s ease 0s;background-position:0px -60px;padding:0px;margin:0px;">BS界面设计&nbsp;</a>、&nbsp;<a href="http://www.lanlanwork.com/csjm.html" style="box-sizing:border-box;text-decoration-line:none;color:#886353;transition:all 0.5s ease 0s;background-position:0px -60px;padding:0px;margin:0px;">cs界面设计&nbsp;</a>、&nbsp;<a href="http://www.lanlanwork.com/scjm.html" target="_blank" style="box-sizing:border-box;text-decoration-line:none;color:#886353;transition:all 0.5s ease 0s;background-position:0px -60px;padding:0px;margin:0px;">ipad界面设计</a><a href="http://www.lanlanwork.com/csjm.html" style="box-sizing:border-box;text-decoration-line:none;color:#886353;transition:all 0.5s ease 0s;background-position:0px -60px;padding:0px;margin:0px;">&nbsp;</a>、&nbsp;<a href="http://www.lanlanwork.com/baozhuang.html" style="box-sizing:border-box;text-decoration-line:none;color:#886353;transition:all 0.5s ease 0s;background-position:0px -60px;padding:0px;margin:0px;">包装设计&nbsp;</a>、&nbsp;<a href="http://www.lanlanwork.com/icon.html" style="box-sizing:border-box;text-decoration-line:none;color:#886353;transition:all 0.5s ease 0s;background-position:0px -60px;padding:0px;margin:0px;">图标定制&nbsp;</a>、&nbsp;<a href="http://www.lanlanwork.com/yhty.html" style="box-sizing:border-box;text-decoration-line:none;color:#886353;transition:all 0.5s ease 0s;background-position:0px -60px;padding:0px;margin:0px;">用户体验 、交互设计、&nbsp;</a><a href="http://www.lanlanwork.com/web.html" target="_blank" style="box-sizing:border-box;text-decoration-line:none;color:#886353;transition:all 0.5s ease 0s;background-position:0px -60px;padding:0px;margin:0px;">网站建设</a><a href="http://www.lanlanwork.com/WEB.html" style="box-sizing:border-box;text-decoration-line:none;color:#886353;transition:all 0.5s ease 0s;background-position:0px -60px;padding:0px;margin:0px;">&nbsp;</a>、<a href="http://www.lanlanwork.com/xz.html" style="box-sizing:border-box;text-decoration-line:none;color:#886353;transition:all 0.5s ease 0s;background-position:0px -60px;padding:0px;margin:0px;">平面设计服务</a></i></b></b></b></b></b></b></strong></b></strong></b></strong></b></b></strong></b></strong></b></strong></b></strong></b></strong></b></strong></b></strong></b></strong></b></strong></b></strong></b></strong></b></strong></b></strong></b></strong></b></strong></b></strong></b></strong></b></strong></b></strong></b></strong></b></strong></b></b></strong> 
</p>

<div>
    <strong style="box-sizing:border-box;font-size:14px;font-family:微软雅黑, Arial, Helvetica, sans-serif;color:#323232;"><b style="box-sizing:border-box;widows:1;"><b style="box-sizing:border-box;"><strong style="box-sizing:border-box;"><b style="box-sizing:border-box;"><strong style="box-sizing:border-box;"><b style="box-sizing:border-box;"><strong style="box-sizing:border-box;"><b style="box-sizing:border-box;"><strong style="box-sizing:border-box;"><b style="box-sizing:border-box;"><strong style="box-sizing:border-box;"><b style="box-sizing:border-box;"><strong style="box-sizing:border-box;"><b style="box-sizing:border-box;"><strong style="box-sizing:border-box;"><b style="box-sizing:border-box;"><strong style="box-sizing:border-box;"><b style="box-sizing:border-box;"><strong style="box-sizing:border-box;"><b style="box-sizing:border-box;"><strong style="box-sizing:border-box;"><b style="box-sizing:border-box;"><strong style="box-sizing:border-box;"><b style="box-sizing:border-box;"><strong style="box-sizing:border-box;"><b style="box-sizing:border-box;"><strong style="box-sizing:border-box;"><b style="box-sizing:border-box;"><strong style="box-sizing:border-box;"><b style="box-sizing:border-box;"><strong style="box-sizing:border-box;"><b style="box-sizing:border-box;"><strong style="box-sizing:border-box;"><b style="box-sizing:border-box;"><strong style="box-sizing:border-box;"><b style="box-sizing:border-box;"><strong style="box-sizing:border-box;"><b style="box-sizing:border-box;"><strong style="box-sizing:border-box;"><b style="box-sizing:border-box;"><strong style="box-sizing:border-box;"><b style="box-sizing:border-box;"><strong style="box-sizing:border-box;"><b style="box-sizing:border-box;"><b style="font-family:&quot;font-size:14px;background-color:#FFFFFF;white-space:normal;widows:1;line-111111111111111111111:20px;color:#3e3e3e;box-sizing:border-box !important;"><strong style="box-sizing:border-box;font-family:微软雅黑, Arial, Helvetica, sans-serif;"><b style="box-sizing:border-box;"><strong style="box-sizing:border-box;"><b style="box-sizing:border-box;"><strong style="box-sizing:border-box;"><b style="box-sizing:border-box;"><b style="box-sizing:border-box;"><b style="box-sizing:border-box;"><b style="box-sizing:border-box;"><b style="box-sizing:border-box;"><b style="box-sizing:border-box;"> </b></b></b></b></b></b></strong></b></strong></b></strong></b></b></strong></b></strong></b></strong></b></strong></b></strong></b></strong></b></strong></b></strong></b></strong></b></strong></b></strong></b></strong></b></strong></b></strong></b></strong></b></strong></b></strong></b></strong></b></strong></b></strong></b></strong></b></b></strong> 
</div>

Vue中select的使用

前端达人

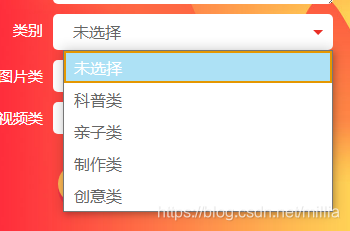
效果:

HTML:

 
  1. <div class="sel01">
  2. <select v-model="selectClassEnd" @change="selectClass($event)">
  3. <option value="NONE">未选择</option>
  4. <option v-for="(options,id) in selectClassData" :key="id" :value="options.id">
  5. {{options.title}}
  6. </option>
  7. </select>
  8. </div>

CSS:

 
  1. .sel01{display:inline-block;position:relative;z-index:2;font-size:1.6rem;height:3.6rem;line-height:3.6rem;width:8rem;flex:1;background:#fff;box-sizing:border-box;border-radius:.5rem;}
  2. .sel01:before{content:"";position:absolute;width:0;height:0;border:.5rem solid transparent;
  3. border-top-color:#e92f26;top:50%;right:1rem;cursor:pointer;z-index:-2;margin-top:-0.25rem;}
  4. .sel01 select{width:100%;border:none;height:3.6rem;background:transparent;background-image:none;-webkit-appearance:none;-moz-appearance:none;vertical-align:top;padding-left:1rem;}
  5. .sel01 select:focus{outline:none;}

JS:

 
  1. export default {
  2. name:"Name",
  3. data(){
  4. return{
  5. selectClassData:[ //类别选择数据或者从后台获取数据
  6. {id:1,title:"科普类"},
  7. {id:2,title:"亲子类"},
  8. {id:3,title:"制作类"},
  9. {id:4,title:"创意类"}
  10. ],
  11. selectClassEnd:"NONE",//类别默认选择
  12. select_class_id:"",//类别id提交报名需要
  13. }
  14. },
  15. methods:{
  16. //类别选中
  17. selectClass(event){
  18. this.select_class_id = event.target.value; //获取option对应的value值 select_class_id是后台约定的提交数据的名称
  19. },
  20. }


蓝蓝设计建立了UI设计分享群,每天会分享国内外的一些优秀设计,如果有兴趣的话,可以进入一起成长学习,请扫码ben_lanlan,报下信息,会请您入群。欢迎您加入噢~~希望得到建议咨询、商务合作,也请与我们联系。

文章来源:csdn

分享此文一切功德,皆悉回向给文章原作者及众读者.
免责声明:蓝蓝设计尊重原作者,文章的版权归原作者。如涉及版权问题,请及时与我们取得联系,我们立即更正或删除。

蓝蓝设计( www.lanlanwork.com )是一家专注而深入的界面设计公司,为期望卓越的国内外企业提供卓越的UI界面设计、BS界面设计 、 cs界面设计 、 ipad界面设计 、 包装设计 、 图标定制 、 用户体验 、交互设计、 网站建设 、平面设计服务


vue-cli@3添加sass(vue项目模板封装系列)

前端达人

前言

上一期分享了如何在vue-cli3的框架中,封装mixins,module 。本期将分享如何在vue项目中添加sass。
在这里插入图片描述

GitHub项目地址:https://github.com/jiangjiaheng/web-template

关于sass

本文默认你对sass有一定的了解,并且阅读过相关的官方文档,因此本文就不在赘述关于sass的基础知识。

在这里插入图片描述
sass官方文档:https://www.sass.hk/

添加方式

1. 创建项目时选择预处理器sass

$ vue create vuedemo
? Please pick a preset: (Use arrow keys)
> default (babel, eslint)
  Manually select features 
  • 1
  • 2
  • 3
  • 4

移动上下键选择Manually select features:手动选择创建项目的特性。

显示如下:

? Check the features needed for your project: (Press <space> to select, <a> to t
oggle all, <i> to invert selection)
>( ) TypeScript
 ( ) Progressive Web App (PWA) Support
 ( ) Router
 ( ) Vuex
 (*) CSS Pre-processors
 ( ) Linter / Formatter
 ( ) Unit Testing
 ( ) E2E Testing 
  • 1
  • 2
  • 3
  • 4
  • 5
  • 6
  • 7
  • 8
  • 9
  • 10

移动上下键在CSS Pre-processors,按提示点击空格键选择CSS-processors。

显示如下:

? Pick a CSS pre-processor (PostCSS, Autoprefixer and CSS Modules are supported by default): (Use arrow keys)
> SCSS/SASS
  LESS
  Stylus 
  • 1
  • 2
  • 3
  • 4

选择第一个SCSS/SASS作为我们的CSS预处理器。

完成后项目会帮我们安装sass-loader node-sass。

2. 手动安装sass-loader

如果在创建项目没有选择CSS预处理器,我们也可以手动安装sass-loader node-sass来集成scss。

npm install -D sass-loader node-sass 
  • 1

使用

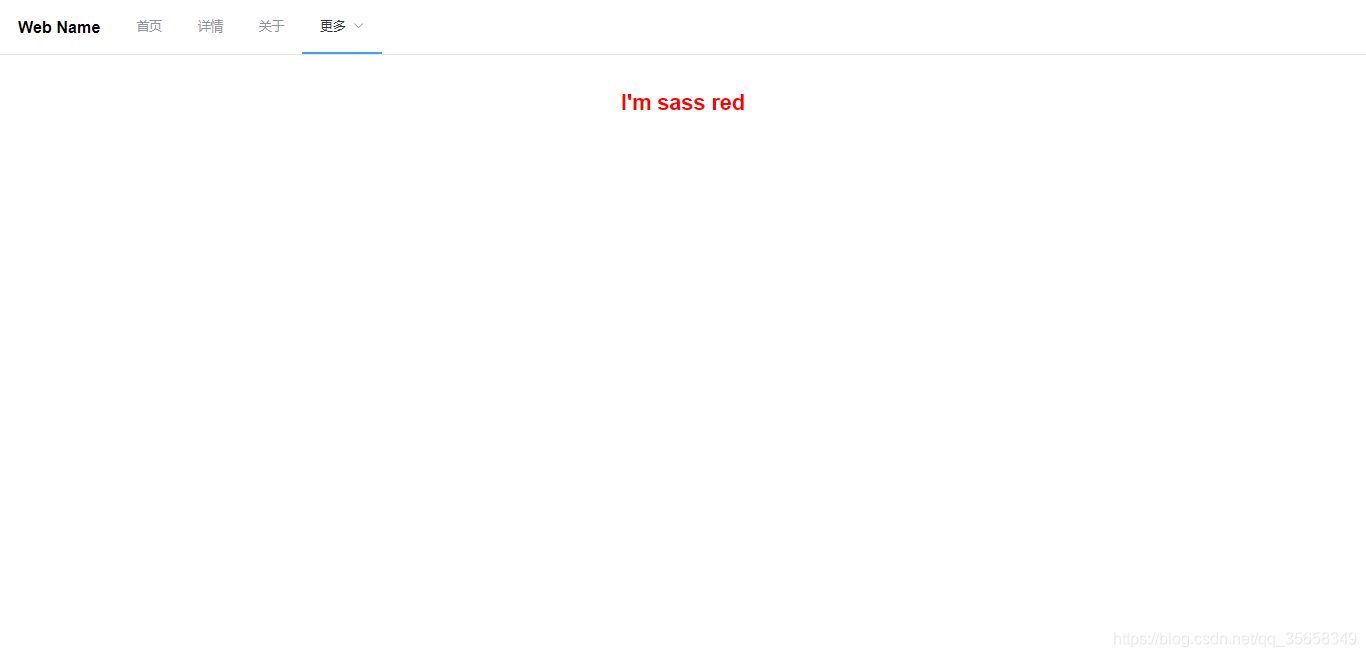
完成添加后,我们只需要在style指定lang为scss即可,无须多余操作:

<style lang="scss" scoped>
$color: red;

h1 {
  color: $color;
}
</style>


蓝蓝设计建立了UI设计分享群,每天会分享国内外的一些优秀设计,如果有兴趣的话,可以进入一起成长学习,请扫码ben_lanlan,报下信息,会请您入群。欢迎您加入噢~~希望得到建议咨询、商务合作,也请与我们联系。

文章来源:csdn

分享此文一切功德,皆悉回向给文章原作者及众读者.
免责声明:蓝蓝设计尊重原作者,文章的版权归原作者。如涉及版权问题,请及时与我们取得联系,我们立即更正或删除。

蓝蓝设计( www.lanlanwork.com )是一家专注而深入的界面设计公司,为期望卓越的国内外企业提供卓越的UI界面设计、BS界面设计 、 cs界面设计 、 ipad界面设计 、 包装设计 、 图标定制 、 用户体验 、交互设计、 网站建设 、平面设计服务

日历

链接

个人资料

蓝蓝设计的小编 http://www.lanlanwork.com

存档